Showing posts with label Argyle embossing folder. Show all posts

Monday, November 19, 2012


Hi Stampers!

Online Extravaganza
November 19th-28th, 2012
Up to 50% Off! 

  • There's no minimum purchase required to participate in this promotion. Sale on!
  • For product bundles, you need to use the bundle item numbers provided. If you use individual item numbers, you won't get the discount--bummer. 
Here is the PDF with the required order numbers so you can get your wish list ready!

There are some one day items only so make sure you check those dates!


Hi Stampers!
I'm continuing on with the Summer Silhouettes Stamp set today.  There are a lot of vowels in "silhouettes" isn't there?  You need lots of vowels sometimes when playing "Words with Friends" so it's good to know those words- even though silhouettes is too long, but I digress.  I love the Argyle impressions embossing folder I used on the background banner here- it makes me happy!  I used the square punch for all the banner edges on this card, large and small.  I also wanted to show you the envelope because it is so much more fun to receive a card in the mail that has a stamped envelope.  Funny Story.  That's what my youngest says when she launches into a funny story so I thought I'd try it.  Funny Story.  I mailed out this card and forgot the envelope- so now I have a stamped envelope with no card.

Today starts the BIG SALE over at Stampin' Up!  Go to my website marystamper.stampinup.net for details!
Thanks for stopping by!

Thursday, June 28, 2012

Hooray! Another Color Challenge!

Hello Stampers!

I'm joining another color challenge over at Create with Connie and Mary (ccmc208) with
colors I rarely use:
They look so cute together with the little suns don't they?  Well, I didn't make little suns but I did pull out one of my new sets for this challenge:

Just seeing the little images from Storybook Friends stamp set brings me back to when my girls were little.  We are all voracious readers and they started from a very young age- maybe from all the books I read to them.  Read to your children!  It's fun!
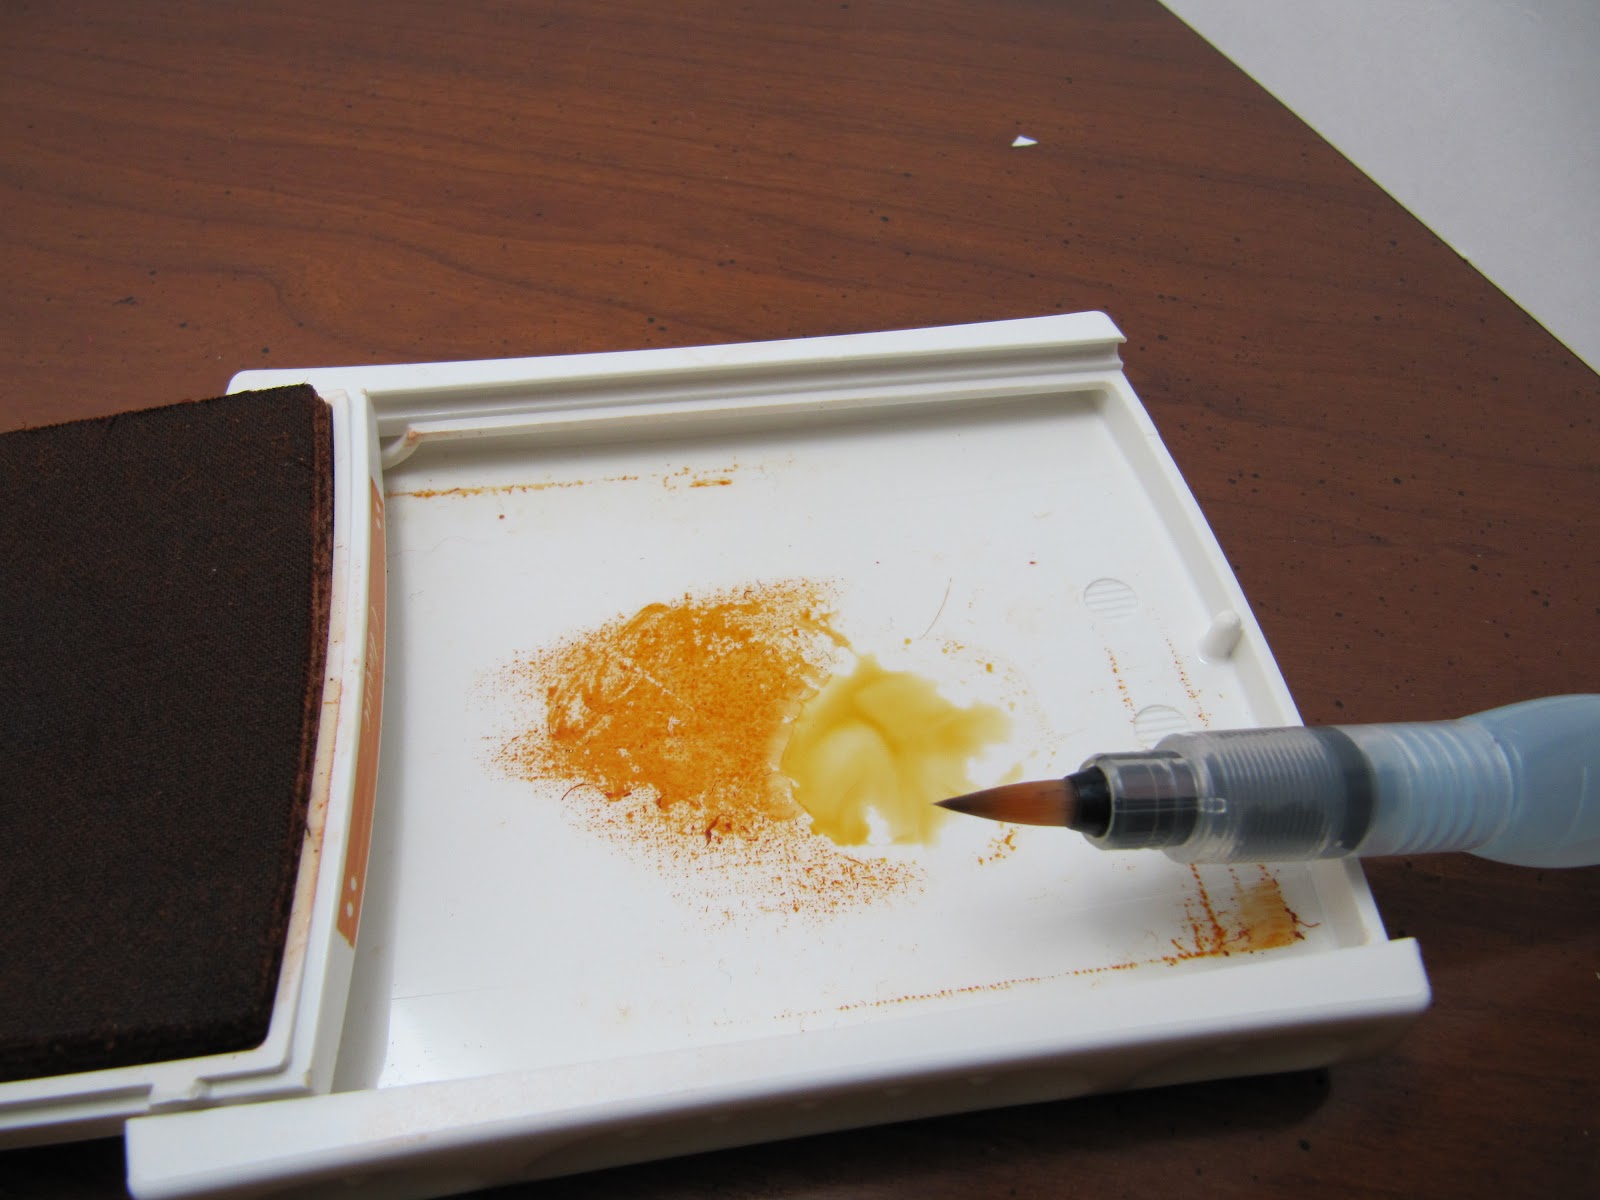
I stamped the fox with my Jet Black Stazon Pad (#101406) and colored in with my Aquapainters (#103954) and my ink pads (Pumpkin Pie, Real Red, Old Olive, and Bashful Blue), and cut out with the Labels collection Framelit. Have you water colored with your stamp pads before?  If you haven't all you need to do is squish your pad before you open them to get ink on the lid of the pad.  You can then pick up this ink with your aquapainter, watercolor paint brush, or blender pen to happily color away!  Just a tip- when painting a larger area, like the fox, get the ink really wet so it  spreads evenly.  You can add more color over the top as you need it but you'll have better coverage to start.  Let me show you what I mean:
Here is the lid with the ink squished on the top.  On the left is how it looks when you open up the case.  On the right I've mixed the ink with the water in my aquapainter to make a "wash".  When I paint on my first coat it looks like this:
It is a light, even coat.  I can then add more color and detailing as I like:
I'm not really very talented at water-coloring but I really don't have to be- the images are so cute they stand up on their own! 
Okay, so I used Basic Gray for the background card stock, and Pumpkin Pie for the belly band, after embossing it with the new Argyle Embossing folder.  I made a banner in Real Red cardstock and embellished it with a Basic Grey button (using the Button, button Sizzlit die).
I guess the last thing I should tell you about is omitting.  The Hooray actually is part of the stamp with the fox.  To stamp the fox with out the words I carefully applied the pad to the stamp without getting the ink on the words.  I then cleaned the stamp carefully, let it dry, then inked up the words with the Black Stampin' marker and stamped just the words on the Real Red cardstock.
Thanks for stopping by!
Shop 24/7 by clicking Here


Monday, June 25, 2012

the Wedding Proposal...

Hi Stampers!
My eldest is getting married!  She loves to say "fiance" over and over. "Fiance, fiance, fiance".  Can't say I blame her- he is pretty darn cute, rugged and manly and stuff.  She is marrying the "boy next door"  (Technically, down the street, but in this world these days that's pretty close!), has been "dating" him on and off since high school, and we're close to his parents so it doesn't seem like a big change, but I suspect it will be a good party!  I wanted to make her an organizer to write down thoughts, ideas, action lists, etc, all in one place so I took a composition book and gave it a makeover in roughly her wedding colors:
I haven't seen her actual colors yet so for purple and green I used the new Polka Dot Parade (#126902) DSP in Rich Razzleberry and complimented it with some elements made with the new Gumball green.  I rolled the Wedding Words Wheel with Gumball Green ink onto Whisper white card stock, backed in with green card stock and put it on top of the polka dots.  I cut some hearts with the Hearts Collection Framelits (#125599), embossed them with different embossing folders (Polka dot and the new Argyle), punched some flowers with the retired 5 petal punch, and finished off with a ribbon.
To stick the paper to the composition book, and make sure it adhered very well, I used the Stampin' Up glue stick.  It has a nice wide side that makes it easy to apply and it really sticks well for a project like this.
On the inside I added some tabs with the retired tab punch and also added some envelopes so she could save receipts or other important papers-

I hope this will help my Sweetie to keep organized over the next year!
Thanks for stopping by!