Hi Stampers!
It seems like it's been raining FOREVER here in the rainforest, and the forecast is for more rain all week. There is only one thing to be done- make it rain flowers. Yep, the stamp kind. I know, I told you we won't have the profusion of flowers most of you are experiencing until June, but here in my workshop I can have anything I want. Within reason. And aren't flower stamps reasonable?
To make it more fun, I'm joining a challenge. Makes me think I'm stamping with all my new friends out there ;O). That's you, of course! I found this Mojo Monday challenge here- and I'm supposed to label this MOJO 234.
This is the last week of Sale-a-bration so I want to use my Everyday Enchantment collection products while they are still available. The way my DSP fit together made me think of a quilt so I punched some holes with my mat pack (#105826) and paper piercing tool (#116631) and then inked with the uni-ball signo gel pen (#105021) to make it look like I actually pulled out my sewing machine.
I hope it's raining flowers in your world today!
Thanks for stopping by!
Raining Flowers stamp set #122765w 122767c
Teeny tiny wishes # 115370
Poppy Parade card stock #119793
Poppy Parade stampin pad #119782
Everyday Enchantment DSP
Everyday Enchantment ribbon
Calypso Coral card stock #122925
Calypso Coral stampin pd #122939
Pool Party card stock #122924
Pool Party stampin pad #122938
Whisper White card stock #100730
Lucky Limeade stamp pad #122935
Blender Pen#102845
Bold Brights brad #119740
Dimensionals#104430
Showing posts with label raining flowers. Show all posts
Monday, March 26, 2012
Thursday, March 22, 2012
Congratulations!
My Precious Daughter just got her first "Professional" job 2 months before completing her Master's degree. Are we proud? I'd tell you where she will be working but you might not be able to pronounce it and you could embarrass yourself, so I'll spare you. We embarrass ourselves regularly, we're that proud, so we don't mind tripping our tongues over her new place of employment. Nuf said.
I made her a card that I'm going to send (spoiler alert LJ, if you're reading, STOP).
This is a clean and simple card, no gadgets or geegaws, just the word I want to convey to my daughter.
Thanks for stopping by!
Raining flowers stamp set #
Curly cute stamp set #
Pear Pizzazz card stock #
Pear Pizzazz stampin' pad #
Concord Crush card stock #
Concord Crush stampin' pad #
Basic Black stampin' pad #
Basic Black card stock #
Whisper White card stock #
I made her a card that I'm going to send (spoiler alert LJ, if you're reading, STOP).
This is a clean and simple card, no gadgets or geegaws, just the word I want to convey to my daughter.
Thanks for stopping by!
Raining flowers stamp set #
Curly cute stamp set #
Pear Pizzazz card stock #
Pear Pizzazz stampin' pad #
Concord Crush card stock #
Concord Crush stampin' pad #
Basic Black stampin' pad #
Basic Black card stock #
Whisper White card stock #
Friday, March 9, 2012
D is for Dog
Hi Stampers!
I've been seeing this card on a lot of blogs like it's a new thing, however, this is a card we actually made at one of my first "stampcamps" back in 1998. Just goes to show that good things don't go out of style!
Of course I didn't mean the actual card- just this particular fold. I guess I would call it a carton fold, like you are securing a carton or a box, each flap folding down in a clockwise fashion with the last flap tucked under the first. Of course it doesn't make for great photos with the shadows and all, but trust me when I say it's a pretty stinkin' cute card! Wait a minute, that might be a bit boastful so I take it back!
My friend Jan is bringing home her new puppy this weekend. Jan trained her last beautiful yellow lab as a search and rescue dog, and Jan and Bama volunteered many hours, days, and weeks in the service of rescuing those in need. Her new baby still has a smooshy face and it's hard to imagine she'll be anything but cute, but Jan is committed to another service dog, although something not quite as rigorous as search and rescue, and I know they will do great things together.
I made this card for Jan for a "baby shower" for her new bundle of joy. I haven't selected the perfect gift yet, but I hope this card makes her smile!
D is for Dog stamp set #115784
Raining Flowers stamp set #122765
Always Artichoke card stock #105119
Pink Piroutte card stock #100459
Sahara Sand card stock #121043
whisper white card stock #100730
Always Artichoke stamp pad #103008
Pink Pirouette stamp pad #111838
Sahara sand Stampin' write marker #105105
Spritzer tool #107066
Scallop Square punch #119884
1 1/4" Circle punch # 119861
Rhinestone brad #109110
Thanks for stopping by!
I've been seeing this card on a lot of blogs like it's a new thing, however, this is a card we actually made at one of my first "stampcamps" back in 1998. Just goes to show that good things don't go out of style!
Of course I didn't mean the actual card- just this particular fold. I guess I would call it a carton fold, like you are securing a carton or a box, each flap folding down in a clockwise fashion with the last flap tucked under the first. Of course it doesn't make for great photos with the shadows and all, but trust me when I say it's a pretty stinkin' cute card! Wait a minute, that might be a bit boastful so I take it back!
My friend Jan is bringing home her new puppy this weekend. Jan trained her last beautiful yellow lab as a search and rescue dog, and Jan and Bama volunteered many hours, days, and weeks in the service of rescuing those in need. Her new baby still has a smooshy face and it's hard to imagine she'll be anything but cute, but Jan is committed to another service dog, although something not quite as rigorous as search and rescue, and I know they will do great things together.
I made this card for Jan for a "baby shower" for her new bundle of joy. I haven't selected the perfect gift yet, but I hope this card makes her smile!
D is for Dog stamp set #115784
Raining Flowers stamp set #122765
Always Artichoke card stock #105119
Pink Piroutte card stock #100459
Sahara Sand card stock #121043
whisper white card stock #100730
Always Artichoke stamp pad #103008
Pink Pirouette stamp pad #111838
Sahara sand Stampin' write marker #105105
Spritzer tool #107066
Scallop Square punch #119884
1 1/4" Circle punch # 119861
Rhinestone brad #109110
Thanks for stopping by!
Friday, March 2, 2012
Photo improvement!
Hi Stampers,
I did a little research because I was unhappy with the quality of my photos. I found out that some people have really fancy cameras, some people have really fancy light boxes, some have both, some only take outside photos (or in the daylight coming in through the window), and everything in between. Well, I have a NICE camera, not fancy, but nice, and I figured I could work out something that would pep up my photos a bit. I did not want to spend a great amount, or even a little amount of money at this point, and as crowded as my stamp room is right now I didn't want to store anything else. I did find someone had posted a tutorial on how to make my own light box using a big box and white fabric, but again I didn't want to store anything that large (and quite frankly, not very pretty). The price was right however so I started thinking about what I already had that I could use. Hmmm. I decided that whatever "box" I used had to be white- could I make one? Well, I found a material that most of us already have on hand, or you do if you are like me and can't really throw anything away. There is a nice piece of 12x12 lightweight cardboard in every pack of Designer Series Paper to keep the paper nice in the packaging- and it is white! I decided that instead of a whole box I would just make a 3-sided "surround". This worked very well, and with my OTT light right over the top the lighting was very good! The nicest part is that it folds up flat and stores in the file with the rest of my DSP until I need it again! This is what my set up looks like:
It's not very fancy, but it is very functional!
Here is the photo of today's project:
I can hear you oohing and aahing over this photo! Okay, maybe not, but I know it's a noted improvement. Next lesson: editing!
So let me tell you about this project. I found the sketch on another blog and I liked the simplicity of it so I had to try it for myself! I've wanted to try out the Basic Grey/Daffodil Delight color combo and this project called to it- the flowers I tried to make look like daffodils by cutting out the centers and elevating them. The stamp set is Raining flowers. I didn't like the one short stem they had included in the set so I used a Pear Stampin' Write marker to draw in the stem. I cut the leaf off of another stamp so I could stamp it more easily. I may be sorry later for cutting up the stamp but it worked well for this project! I used the crimper for the bottom layer to give it some texture. I used the small oval and scallop oval punches and some Daffodil delight ribbon. The final touch is the pearls in the flower centers. It always costs me an additional .20 cents to mail my cards but it is so worth it!
Thanks for stopping by!
I did a little research because I was unhappy with the quality of my photos. I found out that some people have really fancy cameras, some people have really fancy light boxes, some have both, some only take outside photos (or in the daylight coming in through the window), and everything in between. Well, I have a NICE camera, not fancy, but nice, and I figured I could work out something that would pep up my photos a bit. I did not want to spend a great amount, or even a little amount of money at this point, and as crowded as my stamp room is right now I didn't want to store anything else. I did find someone had posted a tutorial on how to make my own light box using a big box and white fabric, but again I didn't want to store anything that large (and quite frankly, not very pretty). The price was right however so I started thinking about what I already had that I could use. Hmmm. I decided that whatever "box" I used had to be white- could I make one? Well, I found a material that most of us already have on hand, or you do if you are like me and can't really throw anything away. There is a nice piece of 12x12 lightweight cardboard in every pack of Designer Series Paper to keep the paper nice in the packaging- and it is white! I decided that instead of a whole box I would just make a 3-sided "surround". This worked very well, and with my OTT light right over the top the lighting was very good! The nicest part is that it folds up flat and stores in the file with the rest of my DSP until I need it again! This is what my set up looks like:
It's not very fancy, but it is very functional!
Here is the photo of today's project:
So let me tell you about this project. I found the sketch on another blog and I liked the simplicity of it so I had to try it for myself! I've wanted to try out the Basic Grey/Daffodil Delight color combo and this project called to it- the flowers I tried to make look like daffodils by cutting out the centers and elevating them. The stamp set is Raining flowers. I didn't like the one short stem they had included in the set so I used a Pear Stampin' Write marker to draw in the stem. I cut the leaf off of another stamp so I could stamp it more easily. I may be sorry later for cutting up the stamp but it worked well for this project! I used the crimper for the bottom layer to give it some texture. I used the small oval and scallop oval punches and some Daffodil delight ribbon. The final touch is the pearls in the flower centers. It always costs me an additional .20 cents to mail my cards but it is so worth it!
Thanks for stopping by!
Saturday, February 18, 2012
Raining Flowers
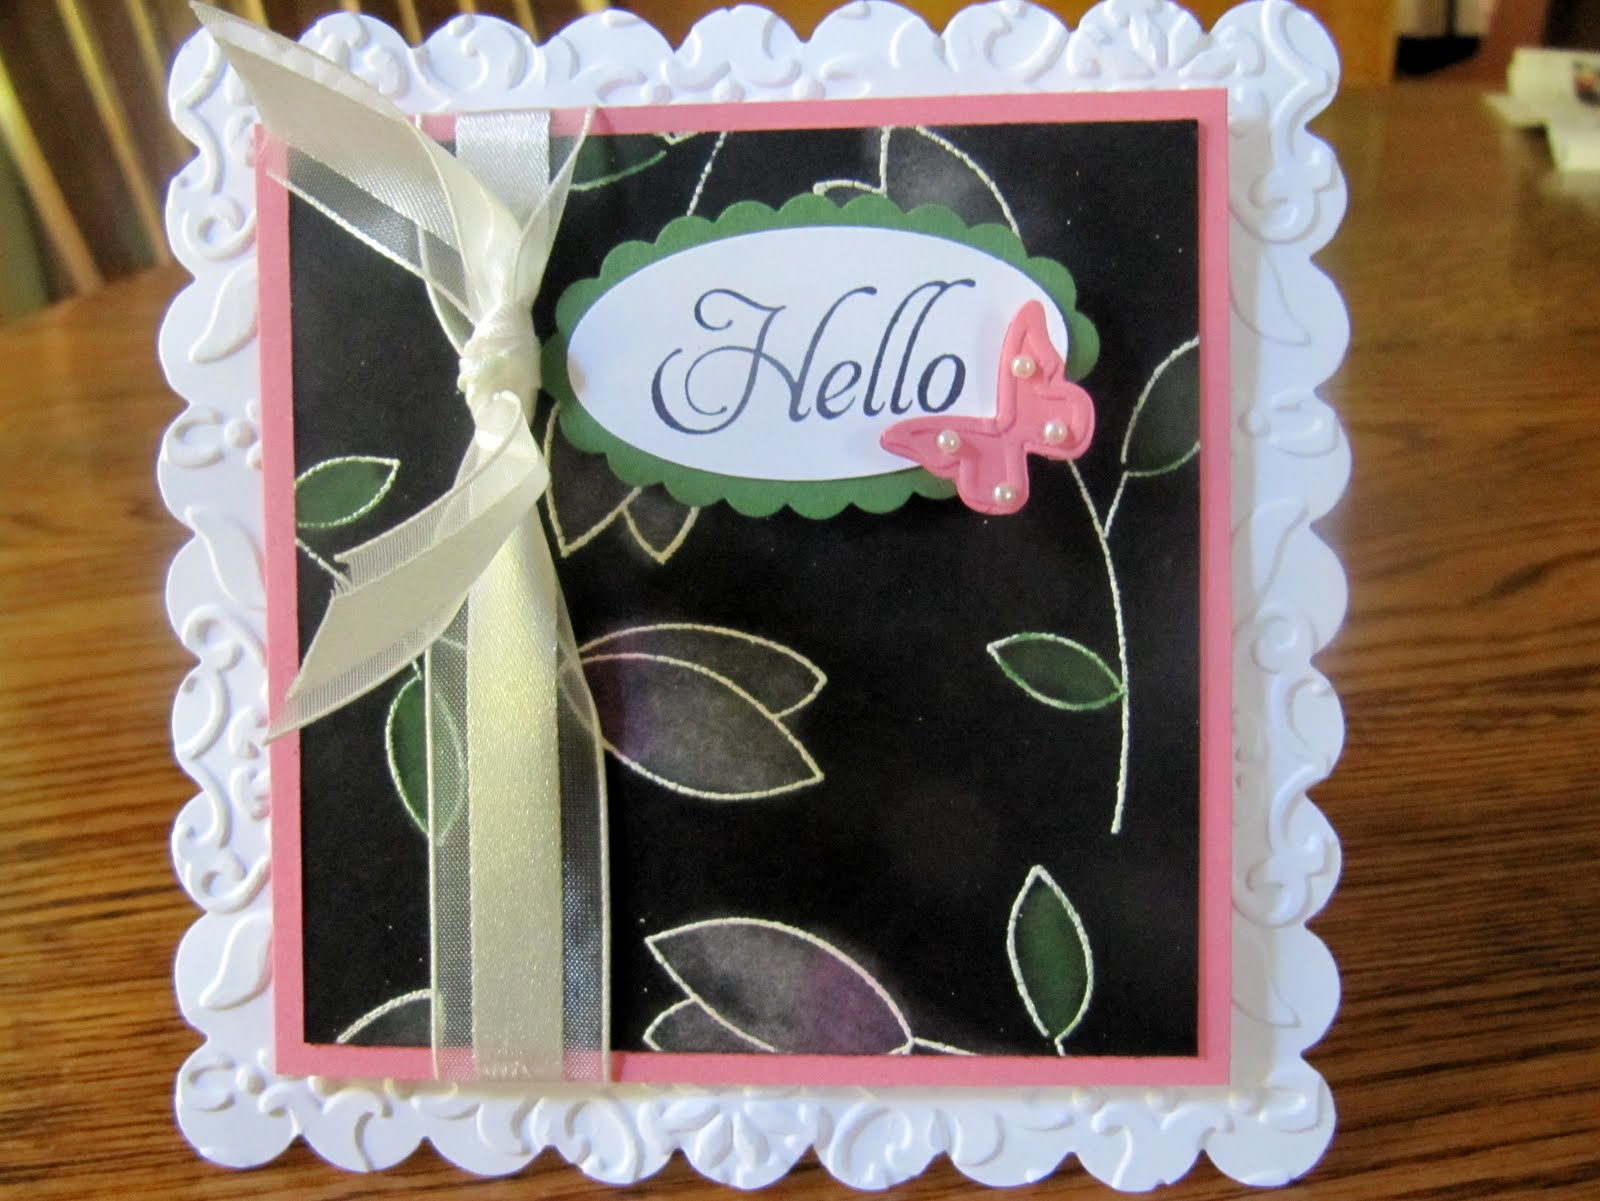
I wanted to try a new technique I found at splitcoast stampers called Pastels on Black. I thought the results were stunning and I was excited to use a new stamp set called "Raining Flowers" (#122767). I've had this stamp set for awhile and never used it (did we get it FREE at convention?). So here is the card and then I'll tell you more about it.
Isn't it cute? I won't go into the details of the technique because you can head over to splitcoast stampers for that. I will tell you that I used craft white stamp pad, white embossing powder, and instead of pastel crayons I used my very old Stampin' Pastels. I loved getting these out again! The card stock is Whisper White, Regal Rose, and Garden Green, and Basic Black. I used Basic Black to stamp the greeting from Elementary Elegance (a FREE Sale-a-bration set). I had to pull out the sizzix to cut the Scallop Square (#115950) and then emboss it with the Vintage Wallpaper embossing folder (#120175). I couldn't resist the butterfly embosslit Beautiful Wings (#118138). And punches- oval and scallop oval, and last but not least, the pretty ribbon is 5/8" organza ribbon (#114319).
I guess I had a ball and I thought I was going simple! Next time, simple it is! Go ahead and try this technique- I think the results are mighty fine!
Thanks for stopping by!
Isn't it cute? I won't go into the details of the technique because you can head over to splitcoast stampers for that. I will tell you that I used craft white stamp pad, white embossing powder, and instead of pastel crayons I used my very old Stampin' Pastels. I loved getting these out again! The card stock is Whisper White, Regal Rose, and Garden Green, and Basic Black. I used Basic Black to stamp the greeting from Elementary Elegance (a FREE Sale-a-bration set). I had to pull out the sizzix to cut the Scallop Square (#115950) and then emboss it with the Vintage Wallpaper embossing folder (#120175). I couldn't resist the butterfly embosslit Beautiful Wings (#118138). And punches- oval and scallop oval, and last but not least, the pretty ribbon is 5/8" organza ribbon (#114319).
I guess I had a ball and I thought I was going simple! Next time, simple it is! Go ahead and try this technique- I think the results are mighty fine!
Thanks for stopping by!
Subscribe to:
Posts (Atom)