Showing posts with label Sweet buttons embosslit. Show all posts

Friday, June 29, 2012

Quilting toward the 4th

Hi Stampers!
Handstamped sentiments  (#123) has a challenge this week that works perfectly with a card I wanted to make so I'll send this over to them after I post it here.  It is inspired by the season (if you can call the 4th of July a season) (and yes, I do, actually) and it kind of goes back to my pillow post.  I haven't actually made said pillows as of yet, but I did tear some ideas out of a magazine.  Maybe next year I'll get to making pillows.
The Challenge is inspired by quilting so I pieced together a sort of star using 1" squares (and triangles cut from same squares) to make a traditional pattern.  The hardest thing about assembling a card like this, and I've noticed this in the past as well, is getting it all square so here is a little tip.  Use your grid paper.  You know the grid paper (#102787) you use as scratch paper to stamp on?  I put my snail on that and laid my squares down on that then trimmed the edges away, voila!  I used the new Midnight Muse card stock with Real Red and Whisper White cardstock.  The buttons are from the Sweet buttons embosslit, and the only stamping is with, wait for it, Teeny Tiny wishes. Can you believe it?  I think it's been a week since I pulled out this old trusty stamp set!  Some dimensionals add depth and there you go.  Happy 4th.
Thanks for stopping by!
Shop 24/7 by clicking Here!

Thursday, June 28, 2012

Hooray! Another Color Challenge!

Hello Stampers!

I'm joining another color challenge over at Create with Connie and Mary (ccmc208) with
colors I rarely use:
They look so cute together with the little suns don't they?  Well, I didn't make little suns but I did pull out one of my new sets for this challenge:

Just seeing the little images from Storybook Friends stamp set brings me back to when my girls were little.  We are all voracious readers and they started from a very young age- maybe from all the books I read to them.  Read to your children!  It's fun!
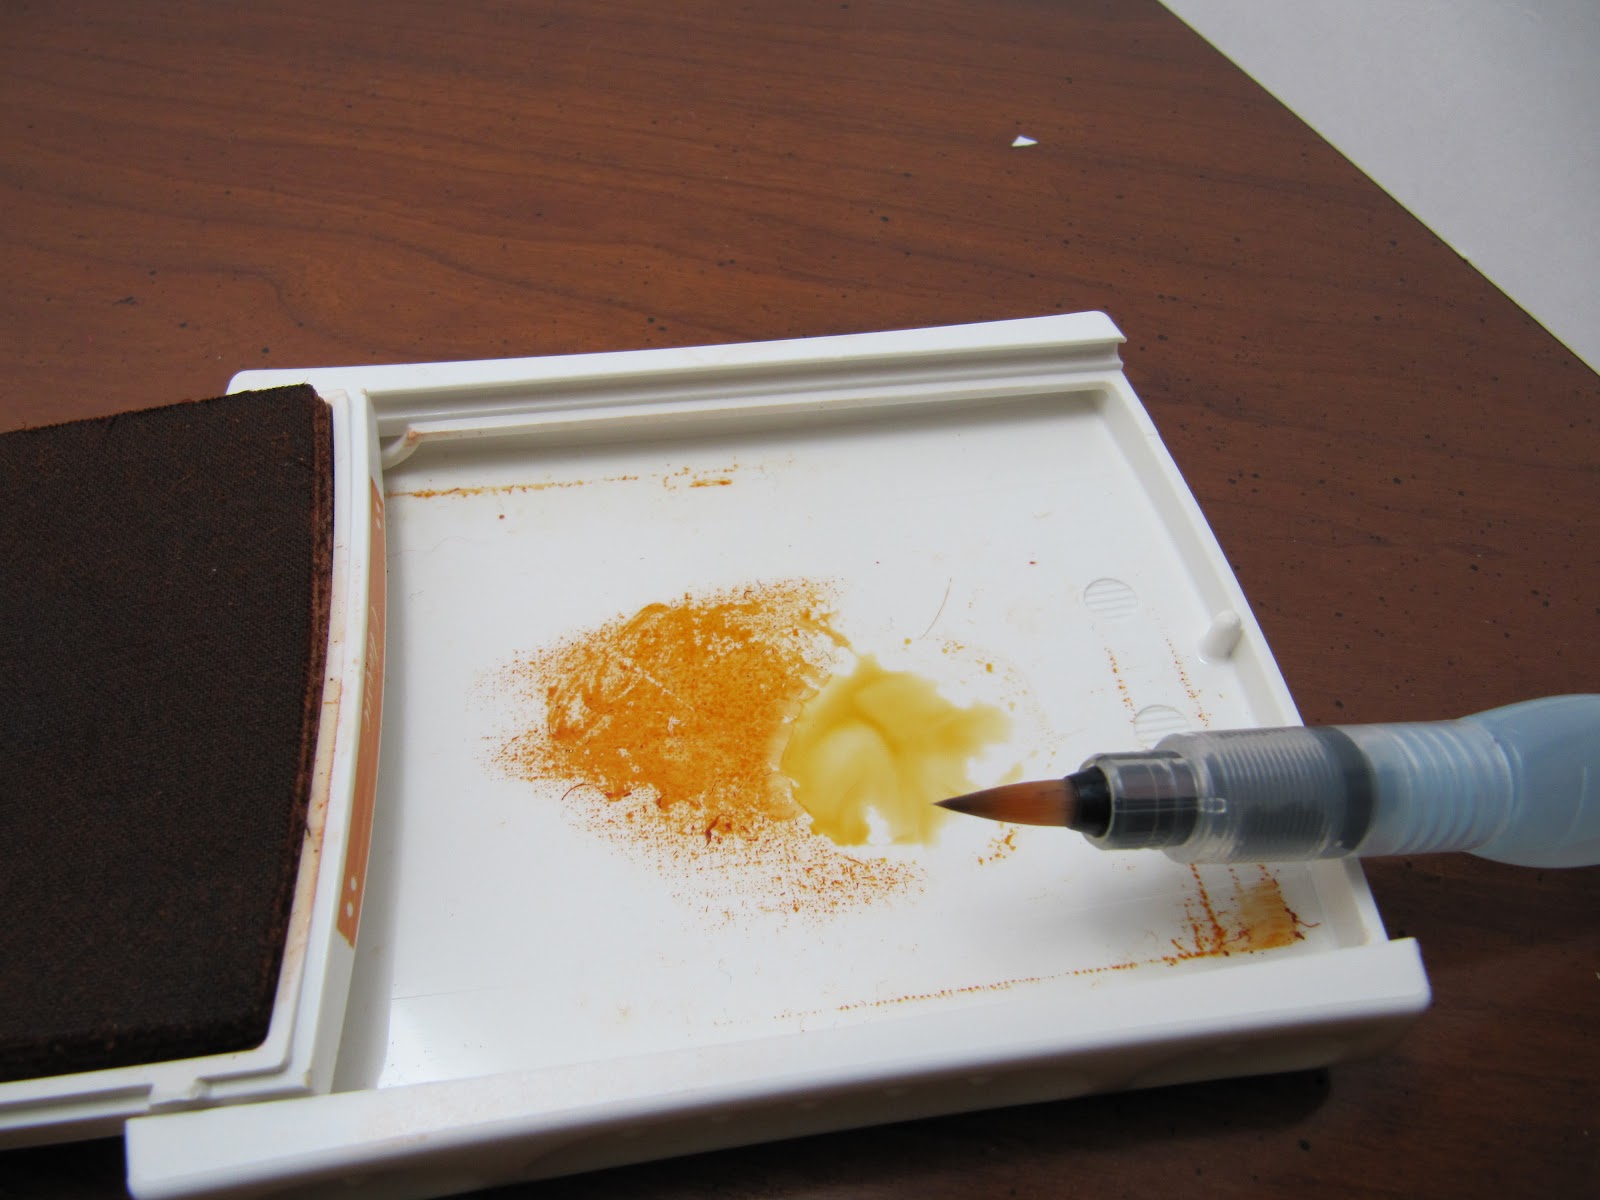
I stamped the fox with my Jet Black Stazon Pad (#101406) and colored in with my Aquapainters (#103954) and my ink pads (Pumpkin Pie, Real Red, Old Olive, and Bashful Blue), and cut out with the Labels collection Framelit. Have you water colored with your stamp pads before?  If you haven't all you need to do is squish your pad before you open them to get ink on the lid of the pad.  You can then pick up this ink with your aquapainter, watercolor paint brush, or blender pen to happily color away!  Just a tip- when painting a larger area, like the fox, get the ink really wet so it  spreads evenly.  You can add more color over the top as you need it but you'll have better coverage to start.  Let me show you what I mean:
Here is the lid with the ink squished on the top.  On the left is how it looks when you open up the case.  On the right I've mixed the ink with the water in my aquapainter to make a "wash".  When I paint on my first coat it looks like this:
It is a light, even coat.  I can then add more color and detailing as I like:
I'm not really very talented at water-coloring but I really don't have to be- the images are so cute they stand up on their own! 
Okay, so I used Basic Gray for the background card stock, and Pumpkin Pie for the belly band, after embossing it with the new Argyle Embossing folder.  I made a banner in Real Red cardstock and embellished it with a Basic Grey button (using the Button, button Sizzlit die).
I guess the last thing I should tell you about is omitting.  The Hooray actually is part of the stamp with the fox.  To stamp the fox with out the words I carefully applied the pad to the stamp without getting the ink on the words.  I then cleaned the stamp carefully, let it dry, then inked up the words with the Black Stampin' marker and stamped just the words on the Real Red cardstock.
Thanks for stopping by!
Shop 24/7 by clicking Here


Friday, May 4, 2012

Paper Pal Arts color Challenge

Hi Stampers,
I was looking for inspiration and found this color challenge over at Paper Pal Arts (ppa134) that looked interesting, and I'm always up for a challenge, so here are the parameters:

PPA134 
All I have to do is use these colors- no problem!
Perusing my stamp sets I immediately zeroed in on the little duck stamp in Easy Events.  The colors are perfect for a baby card, the Calypso Coral giving a bit of boldness to an otherwise soft color palette.  I love the way the scallop punch mimics the wave action of the swimming duck!  How fun is that?  I also have to tell you about the button.  I've been buying buttons for years  because they are so cute, but let me tell you, they are not so cute at the post office.  Have you seen a card that's been mailed with a real button?  They are not always so forgiving in the postal service- although I love my postal workers!  Anyway, this button is from the Sweet Buttons Embosslit die, hence made from cardstock and not plastic, and is a bit less intrusive.  The best part?  I can make it ANY color I want!  There are several sizes on the embosslit as well so you can choose what works best for you.  Check out the Sweet Buttons Embosslit.  The little hearts are from Adorning Accents Textured embossing folders that were in the Occasions mini catalog that recently retired.  The good news?  This little embossing folder is going to carry over into the NEW CATALOG!  How great is that?
Give this color palette a try- I think you'll like it too!
Thanks for stopping by!
Shop 24/7 by clicking HERE!
Easy Events Stamp set #116958w 123225c
Calypso Coral card stock#122925
Calypso Coral stampin' pad #122939
Pool Party card stock #122924
Pool Party stampin' pad #122938
So Saffron card stock#105118
So Saffron stampin' pad #105213
Jet Black Stazon Ink pad #101406
Sweet Buttons Embosslit#121813
Adorning Accents Textured embossing folder #125601
Blender Pen #102845
1 1/4" circle punch#119861
Scallop edge punch #119882
Stampin' Dimensionals #104430
Snail Adhesive #104332